安装 Erlang和RabbitMQ Server ,启动RabbitMQ Server
1、安装Erland,通过官方下载页面获取exe安装包,直接打开并完成安装。(好像要翻墙~自己解决)
2、安装完Erland,配置好它的环境变量,变量值是你自己的安装地址,然后再在path变量加入它
%ERLANG_HOME%\bin
3、然后再安装RabbitMQ服务端,注意如果下载高版本的,对erland的版本也是有要求的,当然你两者都下最新的就没问题了。
4、依然是配置好RabbitMQ的环境变量,和在path变量里新加
%RABBITMQ_SERVER%\sbin
5、然后打开命令行(注意要用管理员的身份打开,不然后面会提示错误~)然后输入
rabbitmq-plugins.bat enable rabbitmq_management
开启Web管理插件,这样我们就可以通过浏览器来进行管理了,一般情况下这时候已经自动启动RabbitMQ服务了,我们也可以手动启动验证一下,输入
net start RabbitMQ
要关闭服务的话,输入
net stop RabbitMQ
6、打开web界面,地址 http://localhost:15672/ 默认的用户名:guest 默认的密码为:guest
你可以点击Admin去创建一个新的用户,我下面配置文件就会用到新的用户的用户名跟密码
springboot整合rabbitMQ
1、新建一个springboot工程,并在pom.xml 中引入与rabbitmq有关的依赖
1
2
3
4
| <dependency>
<groupId>org.springframework.boot</groupId>
<artifactId>spring-boot-starter-amqp</artifactId>
</dependency>
|
2、修改application.yml,配置关于RabbitMQ的连接和用户信息(新建的工程配置文件不是这个名字,改成它即可。。。)
1
2
3
4
5
6
7
8
9
| spring:
application:
name: rabbitmq-test
rabbitmq:
host: localhost
port: 5672
username: admin
password: admin
|
3、创建RabbitMQ的配置类RabbitConfig
1
2
3
4
5
6
7
8
9
10
11
12
13
14
| import org.springframework.amqp.core.Queue;
import org.springframework.context.annotation.Bean;
import org.springframework.context.annotation.Configuration;
/**
* RabbitMQ的配置类
*/
@Configuration
public class RabbitConfig {
@Bean
public Queue helloQueue() {
return new Queue("hello");
}
}
|
4、我们建立一个消息生产类Sender,作为生产者的身边
1
2
3
4
5
6
7
8
9
10
11
12
13
14
15
16
17
18
19
20
21
| import org.springframework.amqp.core.AmqpTemplate;
import org.springframework.beans.factory.annotation.Autowired;
import org.springframework.stereotype.Component;
import java.util.Date;
@Component
public class Sender {
@Autowired
private AmqpTemplate amqpTemplate;
public void send() {
String context = "hello " + new Date();
System.out.println("Sender : " + context);
amqpTemplate.convertAndSend("hello", context);
}
}
|
5、再建立一个消息消费类Receiver,作为消费者
1
2
3
4
5
6
7
8
9
10
11
12
13
14
15
16
| import org.springframework.amqp.rabbit.annotation.RabbitHandler;
import org.springframework.amqp.rabbit.annotation.RabbitListener;
import org.springframework.stereotype.Component;
@Component
@RabbitListener(queues = "hello")
public class Receiver {
@RabbitHandler
public void process(String hello) {
System.out.println("Receiver : " + hello);
}
}
|
6、最后再创建一个测试类RabbitMQTest
1
2
3
4
5
6
7
8
9
10
11
12
13
14
15
16
17
| import org.junit.Test;
import org.junit.runner.RunWith;
import org.springframework.beans.factory.annotation.Autowired;
import org.springframework.boot.test.context.SpringBootTest;
import org.springframework.test.context.junit4.SpringRunner;
@RunWith(SpringRunner.class)
@SpringBootTest
public class RabbitMQTest {
@Autowired
private Sender sender;
@Test
public void testRabbitMQ(){
sender.send();
}
}
|
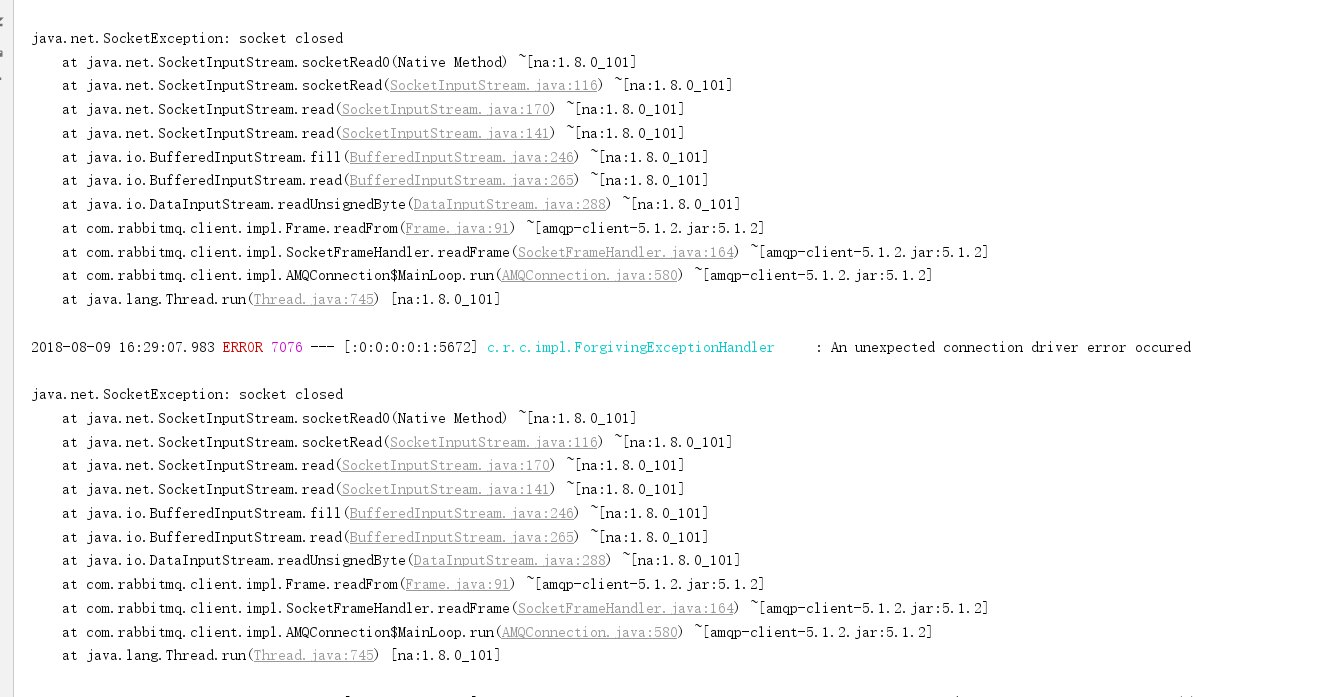
7、先启动主程序RabbitmqApplication,我这边碰到一个错误
![]()
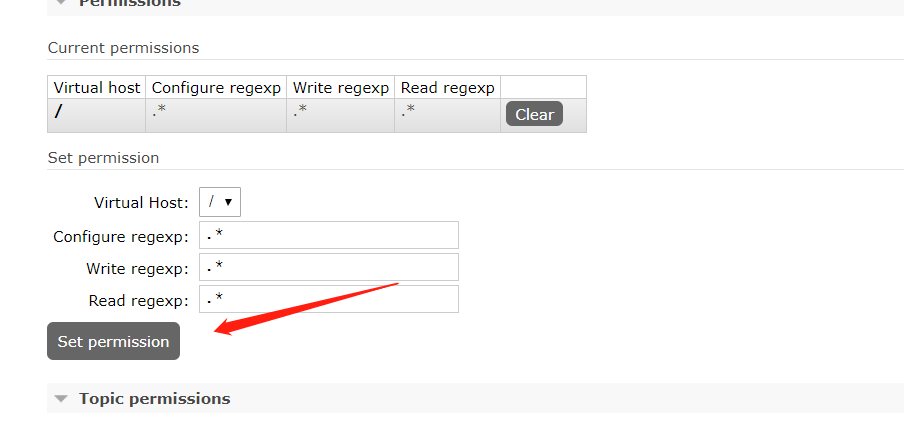
原来是没给admin这个用户设置管理队列的权限,去set一把即可
![]()
再次运行主程序,成功连接RabbitMQ
![]()
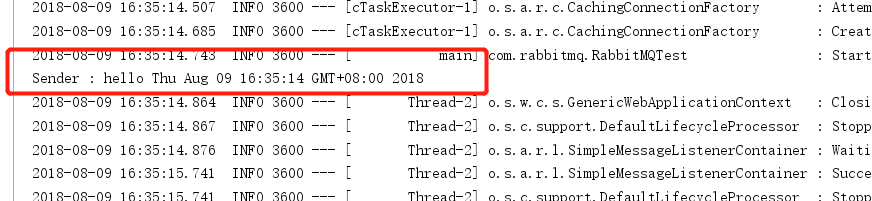
8、去run我们的测试用例方法,看到控制台输出,表示成功
![]()
再切换回主程序,也可以看到输出日志
![]()
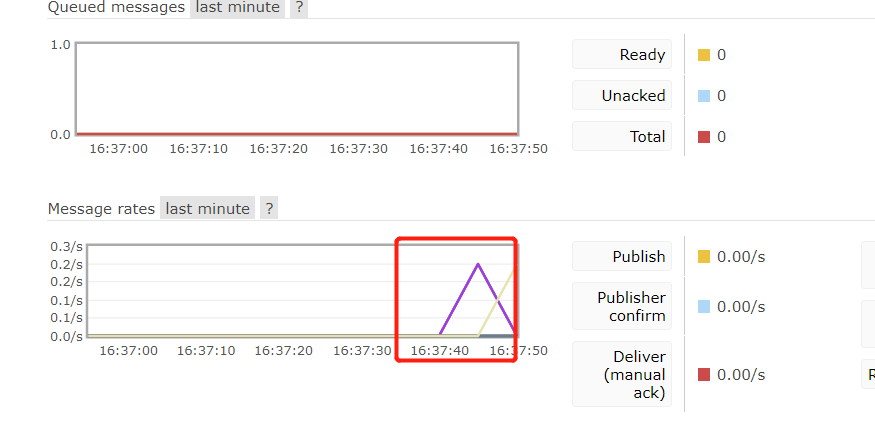
当然我们在RabbitMQ的页面上也可以看到队列的消费信息记录
![]()
以上便是springboot对RabbitMQ的消息生产和消费的最简单的整合,想了解更多请查阅RabbitMQ官网